I'm developing two areas: a capture program for use with machine vision cameras (currently with Firewire 1394a/b interface, but maybe GigE in the future) and a fully adjustable flash lighting system using high brightness LEDs.
The capture system is my custom application which uses an ActiveX control ActiveDcam from A&B Software for the camera interface. The control provides the IEE1394 (Firewire) interface driver, image debayer and display, capture to disk and access to the many camera controls and image data.
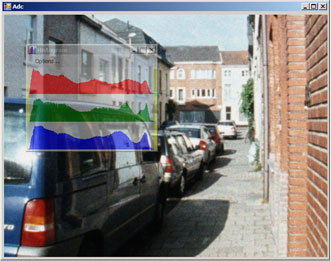
Main features I've developed are a user friendly control interface, live histogram while capturing and second monitor option with real time image processing for previewing negative film for example. Each monitor has selectable magnification and there is a ROI setting for the histogram data. Also provided is automatic internal/external trigger selection between preview and capture modes, etc.
The first version is fully functional as a stand alone application for most Firewire machine vision cameras. Here are some screenshots from this version:
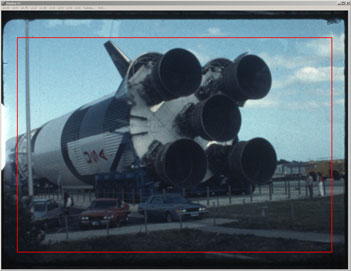
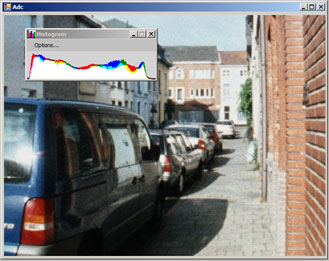
An overlay box can be called up for selecting the ROI window for the histogram. The box can be sized and moved by the mouse.
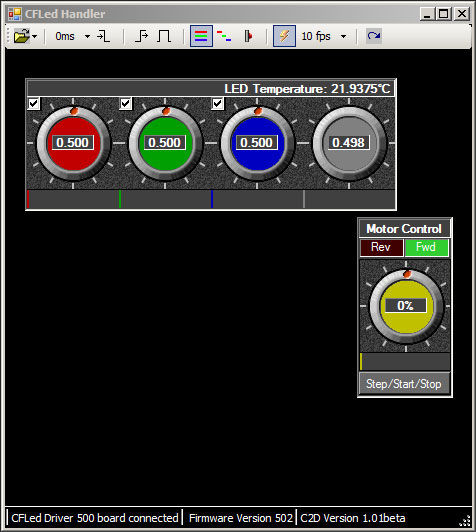
The control system for the LEDs is a newer application, being built on the .NET framework for Windows.
It is the basis for the final application which will include the capture functionality also.
The next stage of the project is to combine the applications into one. This will allow new features such as automatic white balance at the start of scenes (see here: Auto White Balance for a screen grab of my test application in action) and automatic stopping of the capture and projector if a new scene starts which needs White Balance resetting.
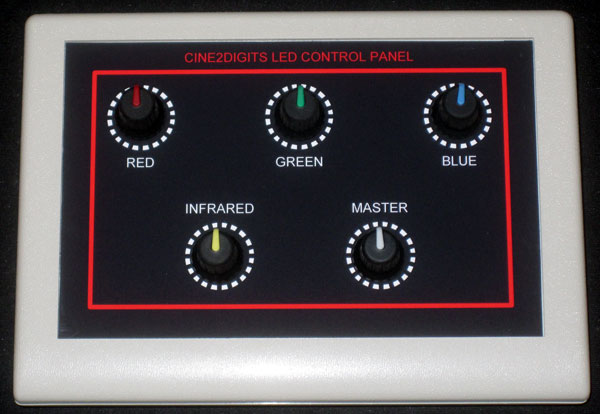 Here's what the hardware control panel for the LEDs looks like:
When a hardware control is operated, the corresponding software control rotates as if it were being operated by the mouse.
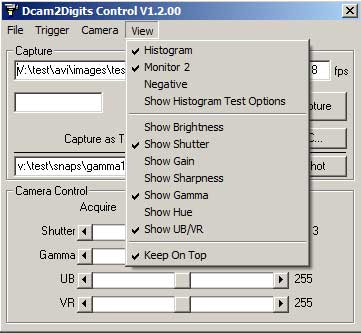
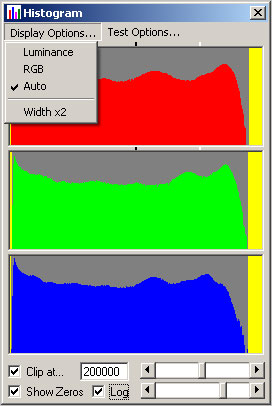
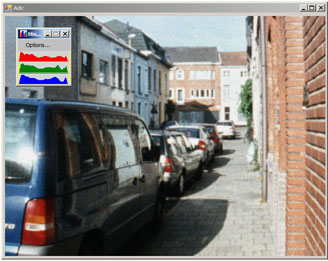
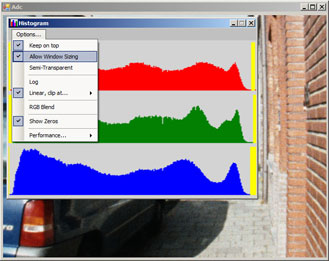
Here's a glimpse of some of the histogram display options for the new version. These are shown in Keep On Top mode, which allows the histogram window to sit over other windows to save screen space:
Dcam2Digits Software
Dcam2Digits (D2D) is my capture program for use with machine vision cameras on a Windows platform. The application was written in VB5 and built on the ActiveDcam SDK, for which I purchased a full development licence.
By special request, I am prepared to release my application for personal use and with no commitment for ongoing support. The application will require an ActiveDcam runtime licence which I will pass on at cost. This is only available from me as it has to pair with my development licence and AB-Soft do not supply runtime licences to anyone who has not first purchased a full development licence. Please email me for details.
The runtime licence will be associated with the PC from which the Control ID is generated and a subsequent unlock code is provided. To be absolutely clear, the licence is not transferable to another PC.
I have tested D2D on Windows XP and Windows 7 32 bit versions. Others have successfully run it under Vista. Fast, high resolution video capture requires a reasonably quick PC with a fast hard disk. I'm not in a position to recommend a minimum hardware specification, but I can say that I managed to have a 1024x768 preview window running at 30fps from my AVT Guppy camera on an old IBM T40 laptop. Capturing fully debayered video to a laptop hard disk at that speed is not possible! In practice, I find around 10fps capture rate to be fast enough to allow for tweaking of exposure and colour balance during capture without having to keep stopping and restarting.
Due to the above, I have prepared a demo version of D2D. This is the full application but there will be a reminder screen on application startup and a watermark on the video. The demo version will run for three weeks, after which a licence must be purchased. Email me for a version which will generate a Control ID in order to obtain an unlock code. If you are interested in D2D, then I strongly recommend fully testing D2D in demo mode as once an unlock code is issued there will be no refund.
Download the complete package from here D2D and unzip to a folder of your choice, ready to run the install. Run Setup.exe to install the demo application then you will need to install the driver for your 1394 machine vision camera by downloading and installing from here: ActiveDcam. IMPORTANT: After downloading, to install correctly right-click the file and select Run as Administrator if using Windows Vista or later. Make sure your camera is plugged in and then run Install Camera Driver from the ActiveDcam programs menu.
Now you are all set to run the D2D application and configure it to suit your requirements. As it was not originally my intention to make D2D generally available, I've not written a user manual for it. Those who have used it so far have managed without, so I recommend playing with the demo first and then, and only then, if you get stuck please drop me an email.
Here are some points to get you started:
Most settings are saved on exit, but only if D2D is closed correctly from the control window. Please do not close the main preview window first, or camera settings will be lost.
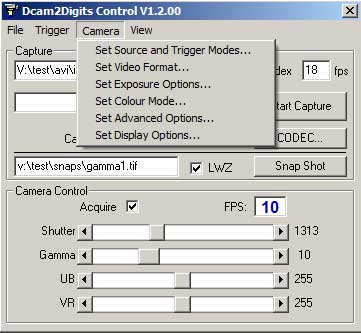
To obtain a colour image, use the Set Video Format dialogue to first set the camera to output a raw mono output as the debayering to a colour image is done within D2D. Then use the Set Colour Mode dialogue to set Bayer Conversion to HQ Linear mode and then Layout to match your camera. Trial and error may be the best way here, but there are only four options!
The live histogram gets its data from the whole frame image by default. This is not what we really want, so use the Set ROI option from the main preview window to draw a box on the screen, from within which the histogram data will be taken. This enables you to exclude non-image data such as the black borders and white sprocket holes (for reversal film of course). Also, a smaller area for data collection may help performance when used on a low specification PC. Please make sure the camera is running (Acquire box ticked) and with a suitable trigger mode selected in order to set the ROI box.
Use the View menu to select which controls you do or do not want available on the D2D Control Panel.
The main Preview Monitor always tries to show the whole image at the multiplication factor selected, adding scroll bars if the window is reduced in size. This allows for a small area to be shown with a high magnification to aid focussing for example. Monitor 2 always shows the whole image, but at a user selectable magnification and will resize automatically accordingly. Monitor 2 can be disabled to help with performance or to clear some screen space if required.
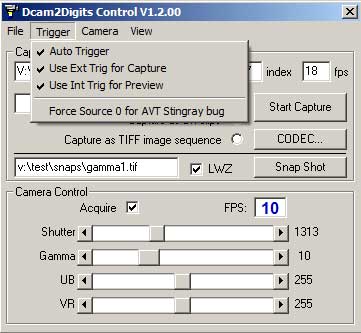
Do set up and try the Auto trigger mode. This can enable, for example, internal trigger while the projector is stationary and capture is off to allow preview and adjustments, then when Start Capture is clicked External Trigger mode will be automatically selected.
There are many other custom features I have incorporated to make film capture both easier and better, so please play and experiment with the application to discover all the goodies!